Arlo Camera Login | MY.ARLO.COM | Arlo.com Login
Arlo
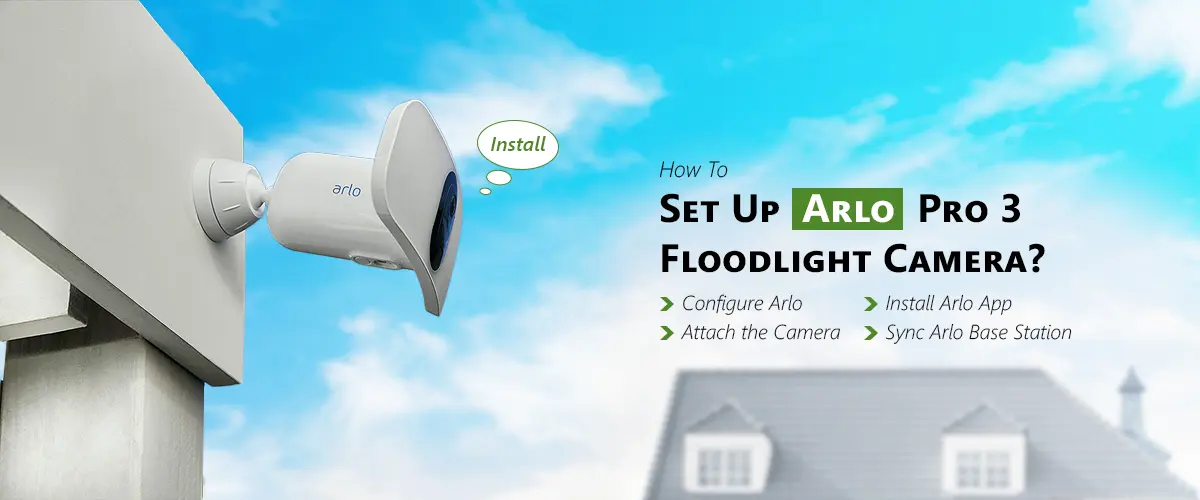
How To Set Up Arlo Pro 3 Floodlight Camera?
Combining intense floodlight lighting with high-definition video quality, the Arlo Pro 3 Floodlight Camera is an outstanding security solution. This cutting-edge security camera provides ease and protection by assisting you in monitoring your property day and night. You’ve come to the correct spot if you recently bought the Arlo Pro 3 Floodlight Camera and are searching for a thorough setup instruction.
From unpacking and installing the Arlo Pro 3 Camera to connecting it and setting it up, we’ll take you through every step of the setup process in this article. In order to properly manage your security system, we’ll also go over how to access your camera using Arlo Camera Login.
What’s inside the box? Arlo Pro 3 Floodlight Camera Unboxing
Let’s first see what comes in the package before you start the setup procedure. Comprised with the Arlo Pro 3 Floodlight Camera Setup are:
- The primary device that contains both the floodlight and the camera is the Arlo Pro 3 Camera unit.
- The camera is mounted to a wall or other exterior using a mounting bracket.
- Anchors and screws are mandatory to secure the mounting bracket to the wall.
- Arlo Pro 3 Battery: The camera is driven by a rechargeable battery.
- The battery is charged via a charging cord.
- Quick Start Guide: A useful manual to aid with the initial configuration.
- Arlo Smart Hub, if it’s present: While some Arlo Pro 3 versions may include the hub, others connect over Wi-Fi and function without it.
Let’s move on to the installation and setup now that you are aware of what is inside the box.
A Comprehensive Guide to Arlo Pro 3 Floodlight Camera Setup
1. Get the battery charged
You must first charge the Arlo Pro 3 Camera because it is powered by a rechargeable battery. Plug the camera into a power socket after connecting the charging wire. It might take a few hours for the battery to fully charge, depending on its current state of charge. Make sure the battery is properly put into the camera unit while it is charging.
2. Installing the Camera
It’s time to attach your Arlo Pro 3 Floodlight Camera when the battery has been charged. You must pick a good spot to attach the camera because it comes with a mounting bracket.
Your Arlo Camera should be placed close to the entryway or in any other location you wish to keep an eye on. Mounting it low enough to adequately illuminate the area when the floodlight is activated yet high enough to cover a large area is crucial.
To install the camera:
- Fasten the mounting bracket to the selected wall or surface. To secure the bracket, you must drill holes for the screws and use the included anchors.
- Attach the camera unit to the bracket after it is in position. It ought to firmly snap into position.
3. Get the Arlo app installed.
The Arlo app must then be transferred and fixed on your tablet or smartphone. Get the Arlo app. It is obtainable for transfer from the App Store.
- After installation, launch the Arlo app and log in using your current Arlo credentials. You will be asked to generate an account if you don’t before now have one.
4. Attach the camera to your network of wireless devices.
Connecting your Arlo Camera to your Wi-Fi network is now necessary. To accomplish this:
- Choose the Arlo Pro 3 Floodlight Camera from the list of devices that are accessible by tapping on Add Device in the Arlo app.
- To link your camera to your home Wi-Fi network, observe the commands. During the setup procedure, your Wi-Fi credentials (password and SSID) must be entered.
- To avoid connectivity problems later, make sure the Wi-Fi signal where you’re placing the camera is strong and steady.
5. Arlo Base Station and Camera Sync (Optional)
You must sync the camera with the base station if you have the Arlo Smart Hub that was included with your Arlo Pro 3 package. In addition to adding cutting-edge capabilities like local storage for video recordings, the base station enhances connection.
The camera and base station can be synchronized by:
- On the base station, press the sync knob.
- Press your camera’s sync button, which is on the rear of the device, within two minutes.
- After syncing, the camera will show up on the Arlo app, allowing you to adjust settings.
- You may omit this step if you’re connecting to Wi-Fi directly (without the base station).
6. Log in to Arlo Camera to View Your Camera Feed
The Arlo app allows you to view the live feed from your Arlo Pro 3 Floodlight Camera after it has been connected and synchronized. Just input your credentials to access your Arlo Camera Login. You may do the following from here:
- See your camera’s live video feeds.
- Set up the video recording parameters.
- Turn on notifications for motion detection.
- Configure the behavior of the floodlight.
- Customize notifications and activity zones.
7. Configure Your Preferences
It’s time to modify the settings to your liking now that you have access to the Arlo Pro 3 camera stream. You should adjust a few important parameters, such as:
- Motion Detection: Create distinct activity zones and fine-tune the motion detection’s sensitivity.
- Floodlight Control: You have the option of manually controlling the floodlight or having it turn on automatically when motion is detected.
- Sound Detection: You can talk and listen to people via the camera with the Arlo Pro 3’s two-way audio.
- Night Vision: To get the best results in low light, adjust the camera’s night vision settings.
8. Check the Camera and Modify Position
It’s a good idea to test the camera after configuring your settings to make sure everything is operating as it should. To test motion detection, move about the camera’s range of view and see how responsive the lighting is. For improved coverage, move or change the camera’s angle as needed.
The Arlo Pro 3 Floodlight Camera’s Extra Features
Numerous features that improve both its functionality and your security are available with the Arlo Floodlight Camera. Among the noteworthy characteristics are:
- Color Night Vision: The Arlo Pro 3 Floodlight Camera records color video even in low light, in contrast to many conventional cameras that convert to black-and-white film at night.
- Smart Alerts: By differentiating between humans, animals, cars, and packages, the camera can notify you when motion is detected.
- Options for Cloud Storage and Local Storage: If you have an Arlo Smart subscription, you can utilize an Arlo Smart Hub for local storage or use cloud storage for your video recordings.
Conclusion
The Arlo Camera offers strong security features for your house or place of business and is easy to set up. You may quickly connect and set up your camera by following the preceding instructions. To keep an eye on your camera stream and adjust your security settings, don’t forget to often log into your Arlo Camera Login. For anybody wishing to improve their home security system, the Arlo Pro 3 Floodlight Camera is a great option because of its high-definition video, motion detection, and floodlight features.
Recent Post
Recent Posts
- How to Set Up Arlo pro 3 Floodlight Camera?
- Why Is My Arlo Camera Blinking Blue?
- Why is my arlo camera not charging?
- Why is my arlo camera not detecting motion?
- How to Fix Arlo Camera Red Light Blinking issue?
- Why Is My Arlo Camera Not Connecting and How to Fix It?
- How to Resolve the Arlo Camera Offline Issue?
- Why is my arlo camera blinking orange?
- Why is My Arlo Camera Not Recording?